Monday, November 11, 2013

When a Disaster Becomes a Masterpiece

I usually pride myself on being really good at choosing my colors and having an idea in my head to go on. This latest canvas started out with an idea, but quickly spiraled out of control and ended up being one of the most messed up pieces I have ever done. I kid you not, it was just awful. Just take a look at the before and after pics and I will explain the journey:
Now you see why I refer to the first one as a disaster...It was just sooooooo wrong on so many levels! My first mistake: using pastel colors. Since when am I a pastel kinda chick? I should've known that it was already headed in the wrong direction...Then I added the lettering with molding paste. Once it was dry I used some twinkling H2O's, but as you can see, it was a very stark contrast (and I was starting to really feel uncomfortable with what it was turning into). Then I decided that outlining the words would help. I then chose black (seriously?! what was I thinking?). Then when it still felt horribly wrong, I thought maybe I would try some drippage (with India ink?! geez...I think I was channeling Halloween). Have I mentioned that the entire time I kept saying to myself, "maybe it's really not as bad as I think it is...maybe my friends will reassure me that I am just being picky and being my own worst critic again". So I turned it around and showed the girlfriends I was sitting with (we were at an all-day crop in October). My sweet friend, Carla, took one look at it and said, "Oh, honey. Just no!" She confirmed my thoughts exactly! Then my other friend, Karin, said, "Live, laugh, love...and bleed!" Oh my goodness! LOL! The giggles that ensued after this were insane. I do not remember the last time I laughed so hard I could barely breathe! Carla, Karin and Linda (who I was sitting with) have always been very encouraging of my projects and scrapbook pages, but we all agreed 100% that this canvas did not convey the sentiment on it at all!!!

So here is the first canvas again:

Goodbye Silks, Twinkling H2O's, India Ink, and silver glitter paste...time for gesso:

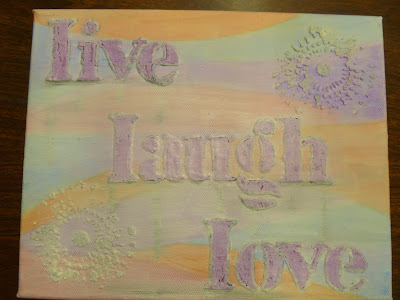
I am very thankful that Carla said I should take a pic of the first version so that I could show that anything can be fixed. I really wasn't sure if I could salvage this, but the final version has made me a believer in gesso being a great way to start fresh:


The first thing I did was change the glitter paste to blue. Then I took some modeling cream and smeared it in a few spots and then pushed a stencil against it for some texture. Once dried, I went to my trusty Dylusions ink sprays. VoilĂ ! This makes me happy!! I love color and this was much more natural for me to do (it came together so fast once I just went back to what I love ~ color!). I learned a valuable lesson: I need to work with colors I love, not the colors I think others will love. I painted a bit of acrylic paint on the letters to make them lighter so that they would stand out. I did not want them stark white, so the fact that it reacted with the colors underneath was perfect. Now I can give this to the people it was originally meant to go to. A little piece of me with a nice message for them :)

Saturday, October 19, 2013

Citrine #2, 3 & 5

I have not done a Midweek Mojo for Scrapbook Steals in forever...Tonight I did 3 of them! All week I have been itching to do some layouts (which has not been the case for some time). So, here they are:
This is the one based on this week's sketch (Citrine #5). I flipped it over and modified it a bit, but you can still see where it came from. I used patterned papers from Bo Bunny's Apple Cider line. I love how warm this is. I also used some glitter paper behind the title (which is from paper by Simple Stories, I think - I forgot to write it down). Some Vintage Photo ink around the edges of each paper and it makes me smile. This is a "selfie" picture I took last weekend while hanging out with the girls and I have been wanting to scrap it all week. So much so, that I did 2 pages with it tonight (one for each girl's album). Here is the second one:

Everyone says that you can definitely tell these are my girls and I have to agree. This layout was inspired by another Midweek Mojo (Citrine #3). Again, I used Bo Bunny papers, but this time they were from the Hello Sunshine! line. I seriously love that picture!

And here is my final layout of the night (Citrine #2):
This one has different lines on it: My Little Shoebox (City By the Bay paper, Little Ladies die-cut), DCWV (The Neon Chic Stack papers) as well as chipboard stickers from Basic Grey (Hopscotch). These pictures show just how much my girls love being together. My oldest was sick and the youngest climbed under the covers to be with her. They are 2 peas in a pod!

Friday, October 4, 2013

Kiwi Lane October Blog Hop

It's Blog Hop time! Woo hoo! Can I just say how excited I am to be a part of this (as well as nervous considering the talented company I am keeping)? There is lots of inspiration at each stop (of course originating with Kiwi Lane, which definitely helps when it comes to being inspired). Have you ever used their designer templates? You are in for a treat...So, here are the details - listed below are the stops you should have made along the way and where you have left to visit:

1. Kiwi Lane
2. La-Vie Borde-Perry
3. Lyne Schnable Blodgett
4. Jennifer Budge
5. Meka Matthews
6. Jenn Nicholes
7. Joan Holmes Leitch
8. Michelle King (you are here)
9. Gail Owens (your next stop)

Be sure to stop at each post and leave a comment by Sunday, October 6th 11:59pm MST. This will allow you to be a part of the draw for $25 for the Kiwi Lane Shop (the winner will be announced on the Kiwi Lane blog on Thursday, October 10th. That $25 could get you some fantastic templates like the ones I got to use. 

Being part of the period for World Card Making Day, I was a little bit stressed because I am NOT a card-maker. I tend to stare at my folded cards trying to figure out what the heck I am going to make (it's like my mojo stops at the word "card"). Let me tell you how easy it was to put one together using both the Sentiments templates and the Tiny Shapes set. I was literally done within about 15 minutes (a record for me). Here is the card I made using Sentiments borders (2A and 3A) as well as the hexagons from the Tiny Shapes (2T and 6T):
Even my husband commented on how nice it was (phew!).

Then I decided to do a layout. I used the Sentiments borders (1B, 2A, 3A and 3B) to frame the picture I was displaying. I then used the circles (3T and 7T) for journaling. So easy! I must admit that I have been getting into mixed media, so some of it also made its way onto my layout to embellish my focal point (I am already thinking about how to use different textures while using a few more of KLD's templates - especially the 12" borders). So this is what I came up with:

I love how the borders bring the focus to the picture so that it didn't get swallowed up.

And, I decided to try out a few shapes on an art journal page (shapes 1T, 3T and 6T). Because art journaling is so hot these days I wanted to show you that these templates can be used in a variety of ways:
Thanks for stopping by! Don't forget to leave a comment for your chance to win $25 to spend in the Kiwi Lane Shop :)

Happy Hopping!

Sunday, September 15, 2013

Lots of Fun

Yesterday I got to work on some canvases and one art journal page. I decided I wanted to play with my acrylic paints and Luminarte Silks. The first one turned out like this:

 I started with 4-5 acrylic paint colors and just blended them all together. Once they were all dry, I used gold glitter paste from Viva and a new leaf stencil from StencilGirl. I added a quote I found online and then outlined everything with my Gelly Roll pens. This is an 8x10 canvas I think I may hang in my office at work.

The next canvas started out the same way, but this time it was with one acrylic paint color and 2 Luminarte Silks. I used glitter paste again and the silhouettes are girls from StencilGirl (one of my FAVORITE sets). I also borrowed a stencil of raindrops from a friend of mine (we were 4 getting creative together). I then outlined a couple of raindrops here and there with another Gelly Roll pen. So here is piece #2:

 I really liked how this one turned out (as did my 4 year-old, so it is going in her room), so I decided to do another on a larger scale (14x16 canvas). It's not quite finished, but here is how it looks so far:

I am in love with those silhouettes. So cool!

I also did an art journal page. I had taken some old paper towels that I had been using to blot inks and clean my brush on and stuck them on a page. Then I used my acrylic paints and Silks to make it a picture with a tree:

I think it's pretty cool, myself. Lots of texture because of the paper towels. An experiment that turned out pretty well, I think! That's what I need to remember: art journaling is not about being perfect, it's about letting go and trying new things (no matter how weird they may seem). You never know where you may end up!

Saturday, September 7, 2013

New Stencils!

I got some new stencils (StencilGirl's 9x12 Jump for Joy) Thursday night and was itching to use them. I used the first set to do 2 projects. On the first one I decided I was going to use Silks as a background (I forgot to take the initial picture - DOH!) on an 8x10 canvas and then trace the stencils onto it. Then I covered the canvas with black gesso to allow the Silks to be the colors in the stenciled images:
Then I took my Gelly Roll pens to outline everything. The colors came up from under the gesso and kept with the hues of the rest of the pictures. I also freehanded the outlines of both girls. I like the zig zag feel that adds to the "movement". Here is the final version of the canvas:
My next project was in a mini art journal for my daughter. I am going to use it to chronicle all the cute things she says and does over the years. I'll give it to her when she is somewhere around 16 or 18. I started by spraying the pages with Dylusions spray inks and using the last part of the stencil and red glitter paste:
I then added Silks to add some sheen. The sentiment and outline were done with a white pen:
Then I wrote the story I wanted to put down about my daughter and her first time jumping. I used a black craft marker and then doodled around the edges of the pages to make it feel finished. I love the end result:
I am pleased with the first entry in that journal and can't wait to do more! I have so many cute exchanges already planned to add...

Doodling

I literally did this page while watching a movie on tv last weekend. I used black gesso across the whole page and then used some Gelly Roll pens to doodle (the rays and butterflies were stenciled and then the filling was just doodling on my part. Easy and fun. Here it is:

Saturday, August 31, 2013

If You've Got It, Flaunt It

The other night, I went to my 3rd art journal class. We were working with Silks (and as our instructor, Gisele, says ~ they are yummy!). They go on very smooth when painting them onto a page and they even feel like silk when dry. I did a page I am not too crazy about, but then quickly did 2 background pages to use later on. Here is one of the background pages I did:
I love the warm colors. I used 3 different colors (coral berry, ginger peach and yellow rose) and kept blending and layering until I was happy with the finished look.

Tonight I decided this was the page I wanted to work with. I have a mini flame stencil from TCW. I decided that I would trace the flame pattern and then color around the flames with black gesso. I LOVE how it came out! I then took a stamp I had bought quite some time ago and colored it in with Dylusions ink sprays and acrylic paint and stuck the image on the page. I finished it off with some letter stickers to say, "If you've got it, flaunt it". I love, love, LOVE the finished page in my art journal. 


I think I will have to do a canvas where I play with color and pattern and then cover it with black paint or gesso to allow the colors to be the bits in whatever picture I choose.

Saturday, August 17, 2013

Canvas and Art Journal

I started working on 2 canvases last Friday for my office, but did not finish them. I did manage to get one of them finished tonight (it was only missing a quote). Here it is:
I used Dylusions spray inks once again (even for the hand painted grass and flowers. I used acrylic paint for the quote and Gold's Opaque Flakes on top (for some texture). This just screams "happy" to me :)

Then I decided to work in my art journal. I was totally making it up as I went along and ended up with a page I LOVE!!! This is it:

I started by pouring yellow and blue acrylic paint on one page and then folding them together to mix it around on both pages. Then I went around doing random brush strokes with my paint brush. Then I came up with an idea that to me seemed really outside of the box. Do you see that sheen on the pages? I used gel matte medium to adhere organza ribbon on the entire surface! I wish you could feel it, the texture is so cool. I am definitely going to use that idea again! I then used silver glitter paste with some stencils for the bottom left and top right corners. Next was stamping around the edges and then I painted on the quote with more acrylic paint. LOVE the end result. This was a total experiment and tons of fun. Isn't that what it's all about? (why do I suddenly hear the "Hokey Pokey" in my head???).

Saturday, August 10, 2013

Productive Day!

Today I went to my first all-day crop at Scrapbook Centrale since November 2011 (near the end of my second pregnancy). It is the first time since then that I went to a full all-day crop all alone! Since having Alexis, I always go to the crop in Kahnawake where I bring Erica with me for the first half of the day and then rush through the rest of the day trying to get as much done as possible. It seems I am used to the "focus and plow through" mentality because halfway through the day I had finished doing 12 pages for my 8x8 album of the pregnancy and family pics from Nov/Dec 2011 and Jan 2012! Here they all are:


And then I decided to focus on doing some art journaling. I got 2 pages done:

Once again I played with my Dylusions ink sprays (London Blue, Dirty Martini, Cut Grass and White Linen). I also tried a new product at the store: Viva's glitter paste (what I used to do the rocks). Absolutely gorgeous! I think I am gonna need some more colors. I also used a cute little stamp I just recently got (for a steal because it was in the clearance section of the store). The star was done with a new stencil and then I outlined it with Liquid Pearls. The edges of the page were outlined with a white pen. So much fun!

Then I did this one because I have been itching to use some Stampotique stamps I ordered recently (Smumanha and Smushasha). Welcome to my "ugly" mermaids:


I decided to play with my Faber-Castell Gelatos again (the blue set and the tropical set). I then used the silver modeling cream and coral stencil as well as some stamps (Stampotique - colored with Dylusions ink sprays - and some alphas found at the store for customer use). I did all the bubbles freehand with my white pen and then dotted the edges of the page with Liquid Pearls. Voila!

I am thrilled I got so much done. I worked on 2 canvases last night that need some finishing touches, but they will be posted soon enough (they are going to be hung in my office at work because I have a lot of blank wall space and it needs a dose of "Michelle").

I am bushed...Goodnight!

Saturday, August 3, 2013

8x10 Canvas

Last night I worked on an 8x10 canvas and was once again having fun with my Dylusions ink sprays (bubblegum pink, funky fuchsia and crushed grape). I had a butterfly stamp that I got at NSD a few years ago as part of my goodie bag that I always thought was pretty, but never thought I'd use it. Thank goodness I didn't get rid of it! Now that I am doing mixed media, I am finding uses for things I wasn't using in my scrapbooking. The stamp was from Tattered Angels (Nature in Flight).

Basically, I started by spraying the 3 colors all over the canvas and then letting them drip down a bit (I love "drippage"). Then I stamped the butterfly image on the canvas and then again on white cardstock. I colored it in using the Dylusions spray, London Blue. I went over some spots with a white pen to lighten the butterfly a bit and so that it wasn't too monochromatic. I then stuck it on the canvas using gel matte medium. I used my Gloss-gel pen to do the edges, body and antennae (as well as the "flight pattern"). I used a stencil and light molding paste to do the stars. Once they were inked and dry I added Stickles to get some sparkle. VoilĂ ! A canvas ready to be displayed:


Thursday, August 1, 2013

Inspiration is Everywhere

Last night we had the second monthly meeting of the art journaling club at Scrapbook Centrale with Gisele Cabral (love working with her!). This time we played with Faber-Castell Gelatos. I had tried them before, but didn't really know how to use them properly and wasn't sure if they would be something I'd really ever use. Well, after doing the pages last night, I am a believer! It was a lot more fun (especially after some instruction) than I ever expected. I also liked using it on canvas. It was fun to see what it was like with different textures. So, we used gel matte medium, gesso, canvas and the Gelatos. We also had our pick of punched flowers and leaves to color as well as different images to stamp. I even colored the girl with the Gelatos. Here is what I worked on last night:


Because I used softer colors, I wanted them to pop. I used a black Faber-Castell marker to doodle along the edges as well as to outline the hexagon shapes that were there from using stencils and gesso. I just realized I forgot to mention we started by using the gel matte medium to stick on ripped pages from a book (a major trend right now). The finishing touches were the circles I added by dragging a tube through acrylic paint and then randomly putting them on the pages. I am quite pleased with the look. And no, I did not plan on the look of rolling hills and a "sunset"-colored sky...it just took shape that way! Funny what happens when you just let things take on their own spirit. I love this! And once again, I have another entry in my art journal that does not follow any other color schemes I have used so far (I am obviously not partial to any particular themes). Next month we get to work with silks (I already have a modest stash because I love the metallic finish!). Can't wait!!!

Saturday, July 27, 2013

Imagination Movers Mini Album

My daughter and I went to a concert last November (her first ever). We saw the Imagination Movers, 4 guys from one of her favorite TV shows on Disney Junior. I had found out that they were going to be playing in Brockville (a 2-hour drive from us), but thought it would totally be worth it. It was an amazing experience and one that I documented through pictures the entire concert. In June, I started working on an 8x8 mini album for her to keep in her room to look at whenever she'd like. Today I finished the last 10 pages! I am so excited that I have all the stories written down and that she will have a great souvenir of the very first concert she ever attended. The patterned papers with all the gears are "On the Go" by Bo Bunny. The colors matched everything perfectly and I painstakingly cut out lots of gears to use on each page to keep with the Movers' look:


Saturday, July 13, 2013

Having Fun

While working on the canvas, I was also working on this page (the other had to dry, so no idle hands for this lady!). I wanted to use that cobblestone stencil again, but this time with molding paste. I love the texture it gave. I then decided to spray it with Squeezed Orange and Lemon Zest from the Dylusions Ink Sprays. I like how they mixed. I then dried them before moving on to the top colors. I used Bubblegum Pink, Funky Fuchsia and Crushed Grape. LOVE the bright happy colors on this page! I have a stencil of words that are all attached and I tried using the water spray technique to bring them out, but it was too subtle (the words are too intricate), so I use the White Linen spray. This is what all of that ended up giving me:

Being a girl who loves bright colors, this just makes me smile. However, I needed to make some of the elements "pop". So I decided that the cobblestones should be outlined with my Viva Gloss-gel pen (in Graphite). I then also outlined a couple of the words that I misted with my white pen (I didn't want all of them because I wanted the shadow effect too). Here is what that step led to:


I have another stamp from Stampotique (Supergirl) that I have wanted to use for something and thought I would use her in this. She finished off the page and this is what it looks like now:


I still feel like it is not completely finished. I think it needs some stamping (maybe some butterflies or something like that to fill in some of the "white" space. We'll see...